How to repair a damaged photo with Image Dream
- Welcome to our tutorial for Image Dream!
- In this tutorial I will describe some of the processes involved in restoring a badly damaged photograph which has been torn and creased.
- First of all: Select this image from the installed examples. Also you can download it from our site.
- With a double click we go in to the preparation room.
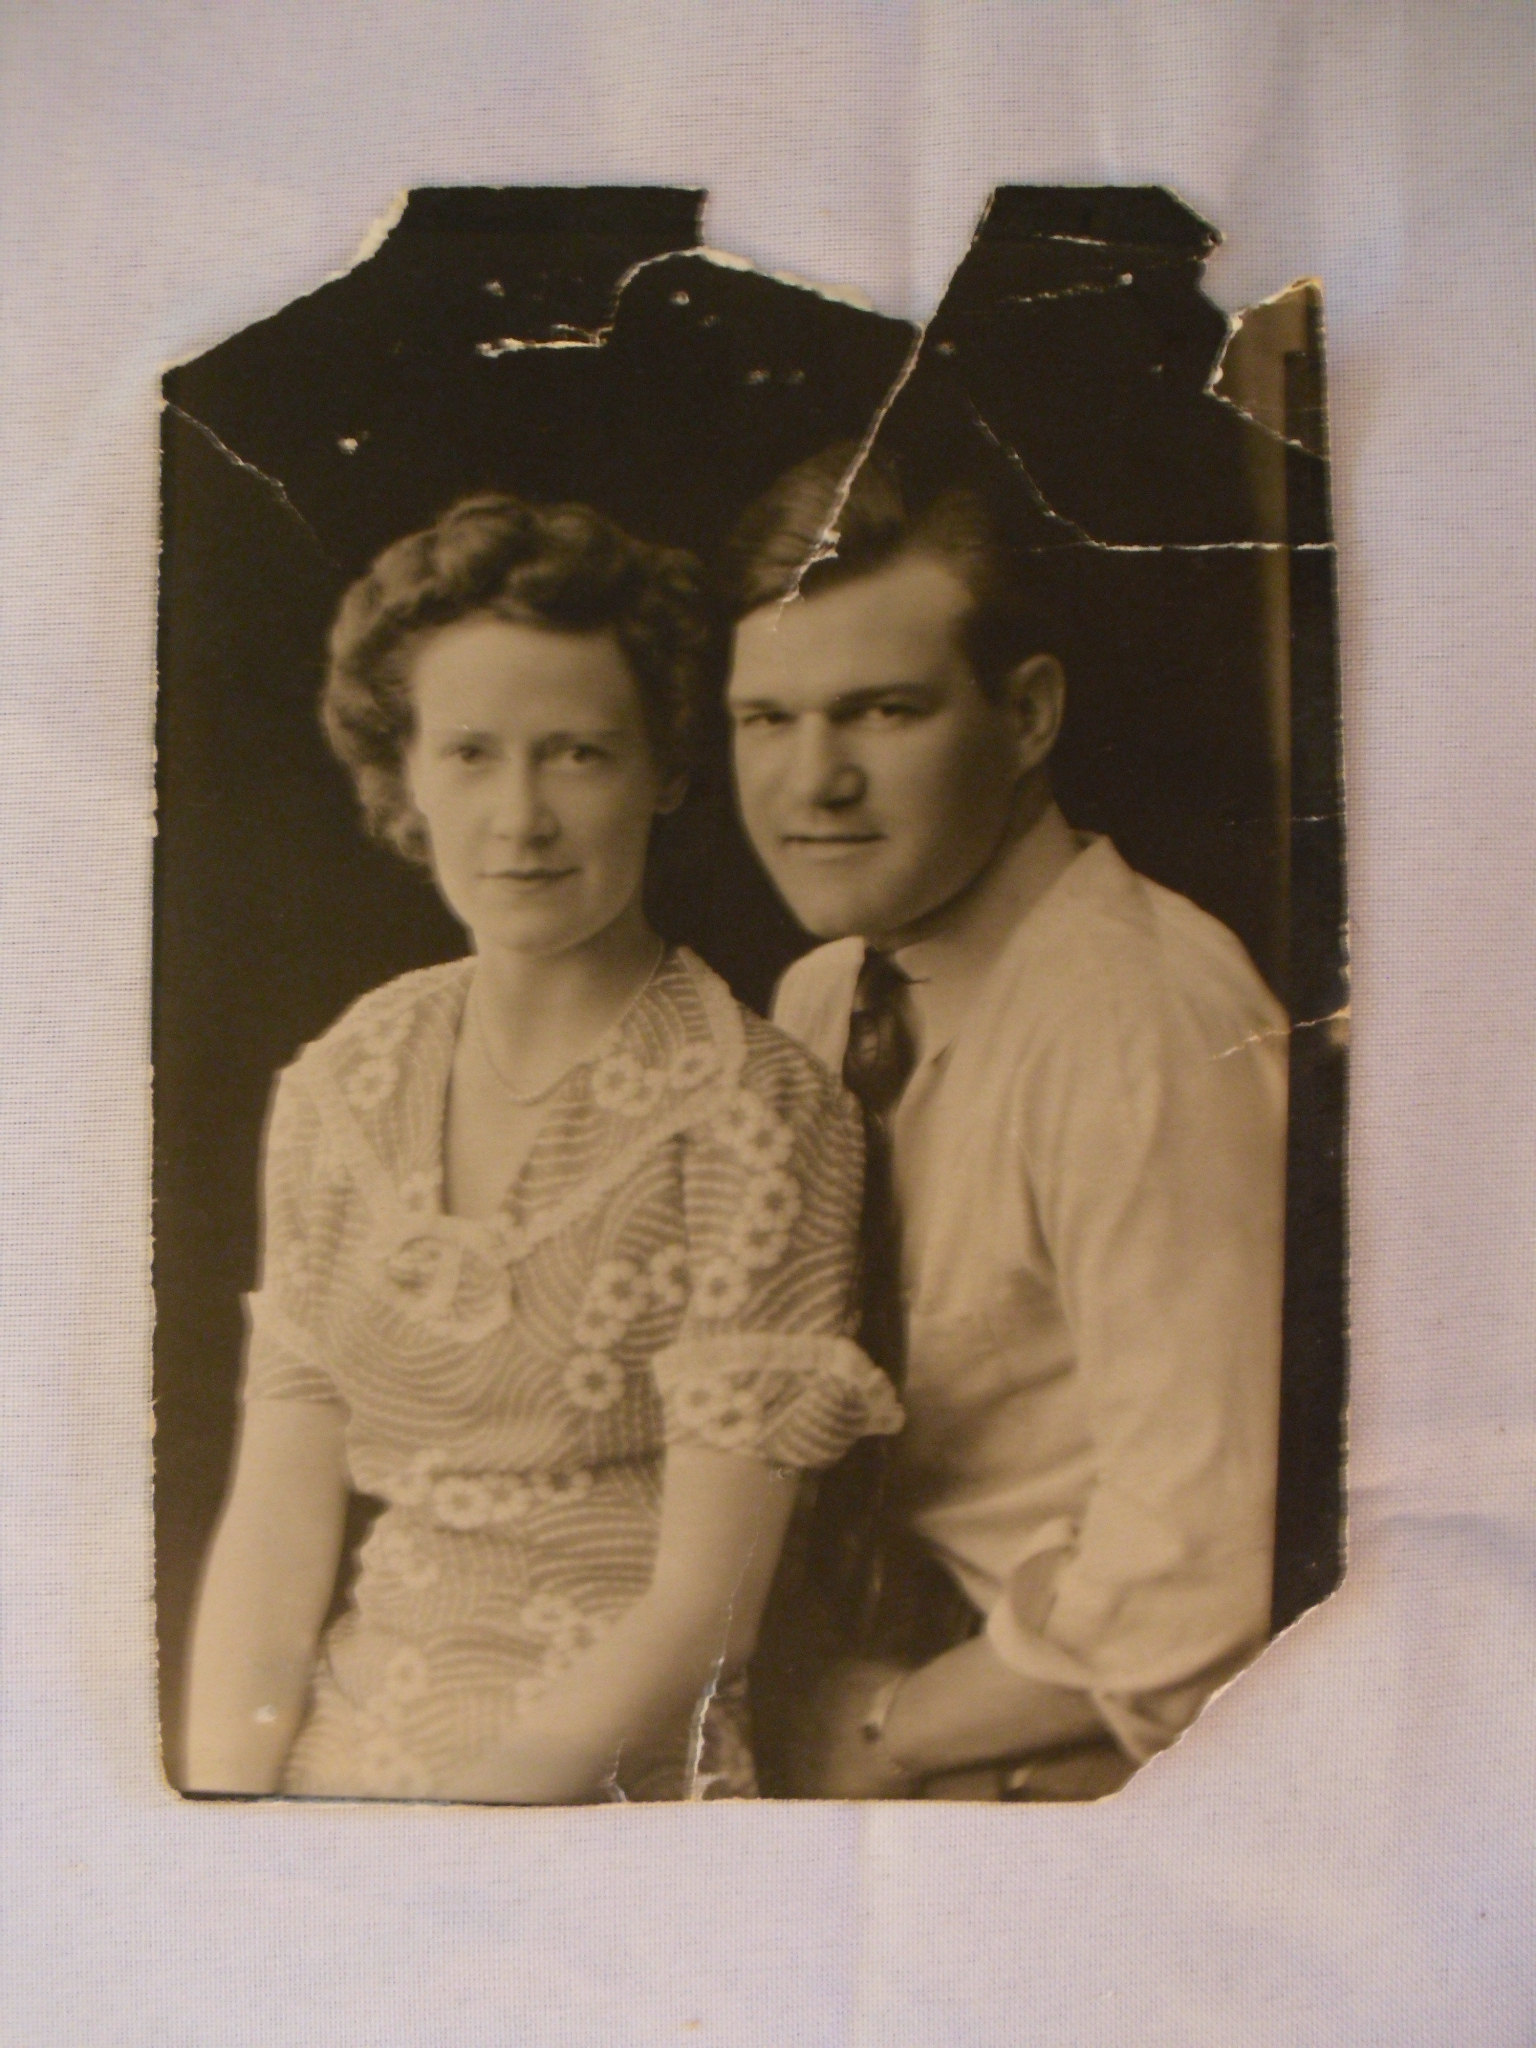
- You see a badly damaged photo which has been torn and creased.
- Cut off the tattered edges by moving the horizontal and vertical scissors.
- After the preparation we should have clean edges.
- Never think of throwing away a photo with this much damage, it can be repaired even with severely torn and worn photos such as this.
- In the title bar you see the map menu, go to it to open the menu.
- Click on the "details" button to enter the details room.
- To save your work you must press the "apply" button.
- To repair the scratches we need the heal tool, so press the desired button.
- Click on the left drawer for using the painting tools.
- Select the smallest brush to heal the scratches.
- First we repair the big scratch at the head by dabbing on it.
- Don't make strokes only dab. click by click.
- After repairing the head, we now fix the crack above.
- Next we overpaint the fold line on the right.
- We repair the smaller line at the right corner.
- Step by step or click by click we remove one scratch after the other.
- Now we zoom out to get an overview if we remove all damages.
- We fix the last failures.
- Finally we will make the picture a little bit sharper.
- Select the big flat brush for the next steps.
- We dab a little bit sharpness onto the faces.
- Now bring sharpness onto the clothes.
- Looks nice but now we see some new scratches which must be removed.
- Now leave the room to save your picture.
- Open the menu and go to the out room.
- To save your work you must press the "apply" button.
- Export your picture by pressing the "save" button or print it out or send it by email to a friend.
- Many thanks for watching our tutorial.
Tutorial